Hello everyone,
Since I missed last weeks update I thought I'd combine the two and tell you how these past 2 weeks of Clindets Acne Therapy has been working.
These past 2 weeks I've noticed my jaw line being especially dry. My jaw line and chin have been very dry and I've experienced peeling too. I think I should do a regular twice weekly exfoliation and see if that helps, so far I've just been piling on the moisturizer. The acne on the top half of my face is practically non-existent at the moment which I love! I've even noticed a reduction in the amount of foundation I need, and once this week I just wore eyemakeup with no foundation or concealer!! Apart from the dryness this Clindets stuff is a dream. I'm halfway done the treatment now so I hope these next 6 weeks will improve the condition of the acne around my chin and lower cheeks. Let me know if you have any recommendations to get rid of the scaliness or dryness of my jawline.
Thanks for reading!

Sunday, 22 December 2013

Saturday, 21 December 2013
Festive Winged Eyeliner and Red Lip Tutorial
Hello everyone! I thought I'd do a tutorial today that was somewhat festive. Of course a red lip and winged eyeliner isn't just a Christmassey look, but I think it looks especially nice at this time of year.


Here are the products I used, I'll explain them all as I use them.

To begin I used Revlon's "Nearly Naked" foundation in the shade 110 Ivory. I applied this all over my face and used a Real Techniques Buffing Brush to blend it into my skin.

Secondly I used Anastasia's "Brow Wiz" in the shade "Ash Blonde".

Here is a picture of my face with my foundation base and eyebrows filled in.
I used Stila's "Stay All Day" eyeliner and applied it close to my lashline and mapped out where I'd like the wing to go.

Next I filled in the line to make it a bit thicker.
To deepen the colour I used Rimmel's "Scandaleyes" eyeliner in the black shade. I applied this to my upper waterline to make sure there was no skincolour showing through.
To balance out the red lip I applied lots of mascara. I used Rimmel's "Scandaleyes Retro Glam" mascara in black and applied a couple of coats to my lashes. False lashes would also look really great with this type of makeup.

This is the Stila eyeliner. It's a felt tip liquid liner which has a long lasting waterproof formula.

The soft kohl pencil from Rimmel makes applying liner to your waterline not as uncomfortable as it would be with a harder pencil. It's also waterproof so it will stay there all day.

This is the mascara, the big wand really adds volume to your lashes, as well as a decent amount of length. The formula isn't waterproof and I think in warmer weather it would smudge a bit, however in the colder months it shouldn't be a problem.

For face powder I used Hourglass' "Ambient Lighting Powder" in the shade "Dim Light". It sets foundation without making your face look really matte.

Lorac's "Tantilizer" bronzer and highlighter duo is a great product for travel. The bronzer is matte, so it's perfect for contouring and the highlighter is a champagne pink shade which is quite subtle.

To add some colour I used Nars "Orgasm" blush. It's a peachy-pink shade with some subtle gold shimmer which adds the perfect amount of colour when you're wearing such a bright lip.

Here's a shot of my face with the eyes and face done. It adds some more colour into my skin so I don't look dead, without being overpowering.

For the red lip I used Rimmel's "Apocalips" in the shade "Big Bang".

Here is the face and lip combo.
The lips just by themselves.

And the full face completed!
I hope you all enjoyed this little tutorial, it's quite simple but I know how much some people dread wearing brighter colours. Now I just have to get myself out of the house!
Friday, 20 December 2013
My Favourite Makeup Brushes
Personally I find the tools we use to apply makeup to be a really important part of the whole process, and although it's often overlooked, a good set of brushes will increase the longevity of your makeup, the overall finish and can be cost effective by using less product with better results.
The brushes I'm showing here are mostly from Real Techniques or Sephora.
The Real Techniques brushes are very inexpensive and excellent, you can find them at WalMart, Ulta and almost everywhere if you're from the UK. They are all synthetic, which means they clean easier and are entirely cruelty free, they can also be used for powder or liquid products. The bristles are soft, the brushes are made so that they can stand up, and the handle of the brush is very easy to use.
The Sephora brushes were a limited-edition set from last Christmas, but there are similar brushes sold individually and they do have gift sets for sale currently either in store or online. These brushes have natural bristles which are very soft and work best with powder products. Because they are actual hair, they're easy to wash but they take a bit longer to dry. Also they need to be shaped more often to help them last longer. The handles on these brushes are very similar to that of a paintbrush, which I like, also the black and gold colouring is classic and I prefer the look of them to the Real Techniques.
I just thought I'd summarize all of this before getting into the individual brushes.




The brushes I'm showing here are mostly from Real Techniques or Sephora.
The Real Techniques brushes are very inexpensive and excellent, you can find them at WalMart, Ulta and almost everywhere if you're from the UK. They are all synthetic, which means they clean easier and are entirely cruelty free, they can also be used for powder or liquid products. The bristles are soft, the brushes are made so that they can stand up, and the handle of the brush is very easy to use.
The Sephora brushes were a limited-edition set from last Christmas, but there are similar brushes sold individually and they do have gift sets for sale currently either in store or online. These brushes have natural bristles which are very soft and work best with powder products. Because they are actual hair, they're easy to wash but they take a bit longer to dry. Also they need to be shaped more often to help them last longer. The handles on these brushes are very similar to that of a paintbrush, which I like, also the black and gold colouring is classic and I prefer the look of them to the Real Techniques.
I just thought I'd summarize all of this before getting into the individual brushes.

This is the Real Techniques Powder Brush. It's a very big brush and is great for face powders, setting powders and bronzer if you want a particularly sun-kissed look.

The RT Buffing Brush is a dense foundation brush which is one of my all time favourites. I use it every time I wear makeup. It applies foundation flawlessly and works better than anything I've previously used.

The RT Multitask Brush is exactly that, it can be used for powder, blush, bronzer, highlighter... whatever you want. I mainly use it for bronzer but it is very versatile.

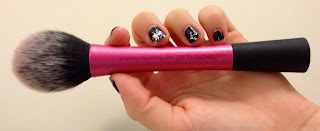
The RT Blush Brush is fantastic. It's tapered bristles mean you can apply product to the tip and then as you use it the shorter bristles surrounding it blend out the colour seamlessly. I'm sure I could use this for other products too, but I love it for blush so much I haven't tried it with anything else.

The RT Contour Brush is made specifically to contour your cheekbones. I do use it for that reason, but I also love using it for cream blush products. I have a lot of redness in my face so I find using a small brush for cream products stop me from applying too much. It works well on the apples on my cheeks without making me look like a tomato.

The Sephora Powder Brush is lovely, the bristles aren't too dense and are longer. It works very well with loose powders especially, and is very soft.

The Sephora Crease Brush is fantastic for blending colours in your eye socket. It looks a bit daunting because the bristles are so long, but it blends very similarly to the RT Blush Brush, creating a seamless finish.

The Sephora Shadow Brush is also really great. It's quite flat and really packs on the colour. I use this for an all over wash of colour and also to highlight my brow bone.

The Sephora Smudge Brush works just like a pencil brush. It is great for applying eyeshadow under your eyes or in the inner corner of your eye for a highlight.

The RT Deluxe Crease Brush can be used in your crease, but I prefer to use this as a concealer brush. It's dense, and quite big for eyeshadow. I think it's a bit like a mini-buffing brush, so I really like using this either dabbing to cover a blemish, or blending a concealer underneath my eyes.

The RT Domed Shadow Brush is basically your ideal eyeshadow brush. It packs on colour, can be used to blend and it's not too big or too small. I use this brush a lot, but don't appreciate it enough. It's probably one of my favourite eye brushes.
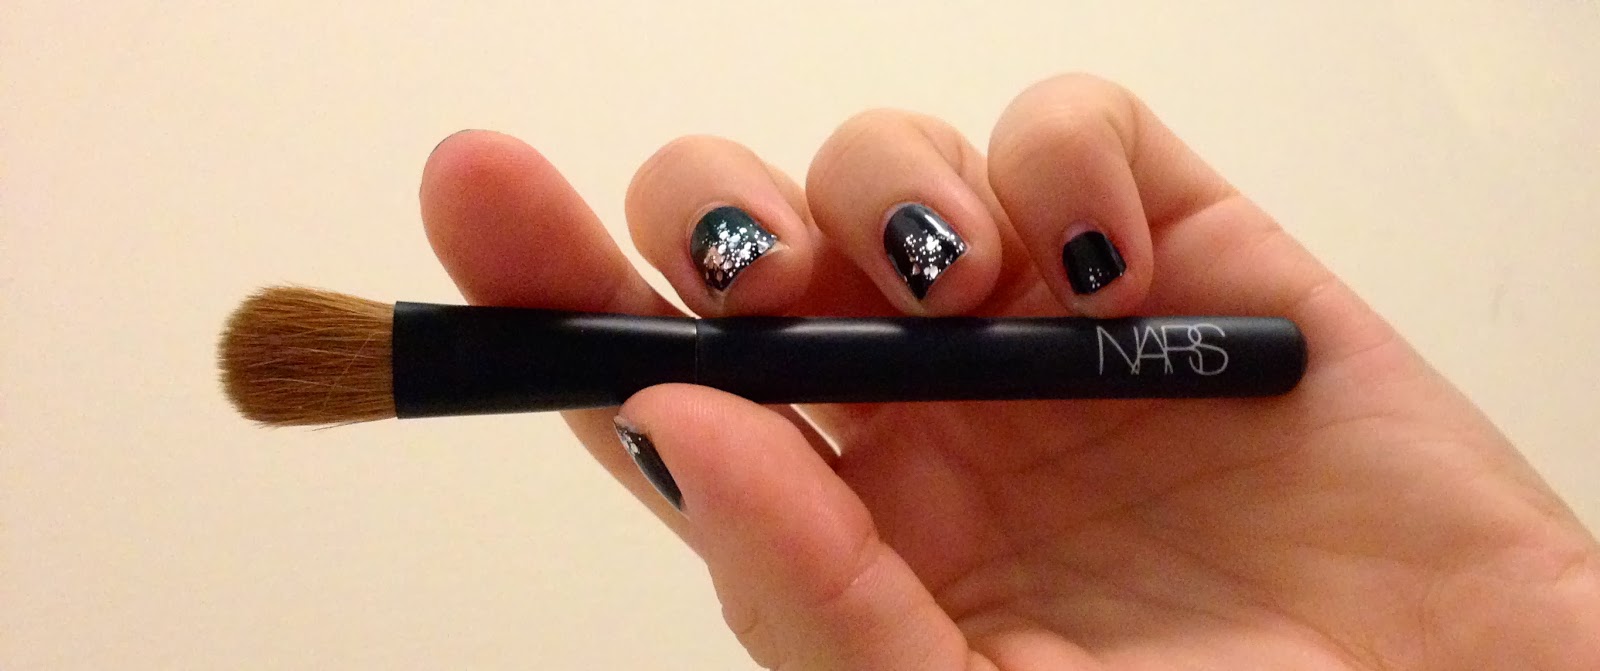
This is the Nars #3 Brush in a mini size. It came with my "And God Created The Woman" palette and I just find it to be a really great little brush. It can be used for a variety of things, but I especially love it as a blending brush.

The Royal and Langnickel Spooley Brush was incredibly cheap and one of my most used brushes. bought it from IMATS last year, and I think it was around $2.00. I use it to comb my lashes on occasion, but mostly to tame my unruly eyebrows.

The Sephora Brow Brush is another favourite, it's perfect for using a powder to fill in your eyebrows and is stiff and dense enough to really create a nice shape.

Finally, the Sephora Blush Brush is basically a smaller version of the powder brush but in a perfect size for applying brush. I also use it for bronzer and think it gives a really soft finish with no harsh lines.
I hope you enjoyed reading about my favourite brushes! Thanks!
Saturday, 14 December 2013
Quick Update
Hey everyone, so as you can tell my blogging hasn't been so great this week. I'm going to be honest and admit I've just taken some time off. For anyone who does blog you'll know finding inspiration, things to write about and take photos of daily is hard work. This week was exam week for me (ugh), but now that I've done things should be back on track. Sorry for the unannounced break, but I will be blogging more frequently now!
Thanks for understanding!
Thanks for understanding!
Monday, 9 December 2013
Manicure Monday Week 4

Firstly (surprise!) I'm not wearing an Essie shade. Instead I'm wearing 2 colours by Nicole by OPI. The darker shade is called "The Grape Debate" and the purple glitter coat is called "Glitz and Glisten". I actually bought them in a set a few years ago and I've never worn them separately, I just think they look so pretty together! I get to wear these shades because I have most of my Essie colours at school and I think this shade is a lovely wintery choice.

Next up I have Essie's "Good as Gold", a pretty matte gold shade. This colour is a nice change from a neutral without being too sparkly. I added a bit of sparkle from Essie's "Hor D'Oeuvres" to create an accent nail and I think it made a nice festive manicure.
I hope you have a good week everyone! If you're writing exams then good luck, and if you have any questions feel free to tweet me @makeupbymegant
Subscribe to:
Posts (Atom)